Daisy Days notebook using Polka Doodles Soup Stamps
I have a real thing for notebooks ... not sure why or how this obsession started but do love a notebook. I have two sitting beside me as I am typing this post: one for crafty projects and ideas and the 2nd for crafty "to do"lists.
So it's no surprise that I have made a further notebook and I took inspiration for the shape from a gift from Luke and Rosie; wonderful tri-fold notebook holder, chocker full of notebooks, decorative papers and other stationary goodies. It however, is made of leather, not card. I found a wonderful tutorial on Alexandria's blog - HERE which is very similar to the tri-fold design of my holder. If you are not following her blog, you really ought to. I love her shabby chic style.
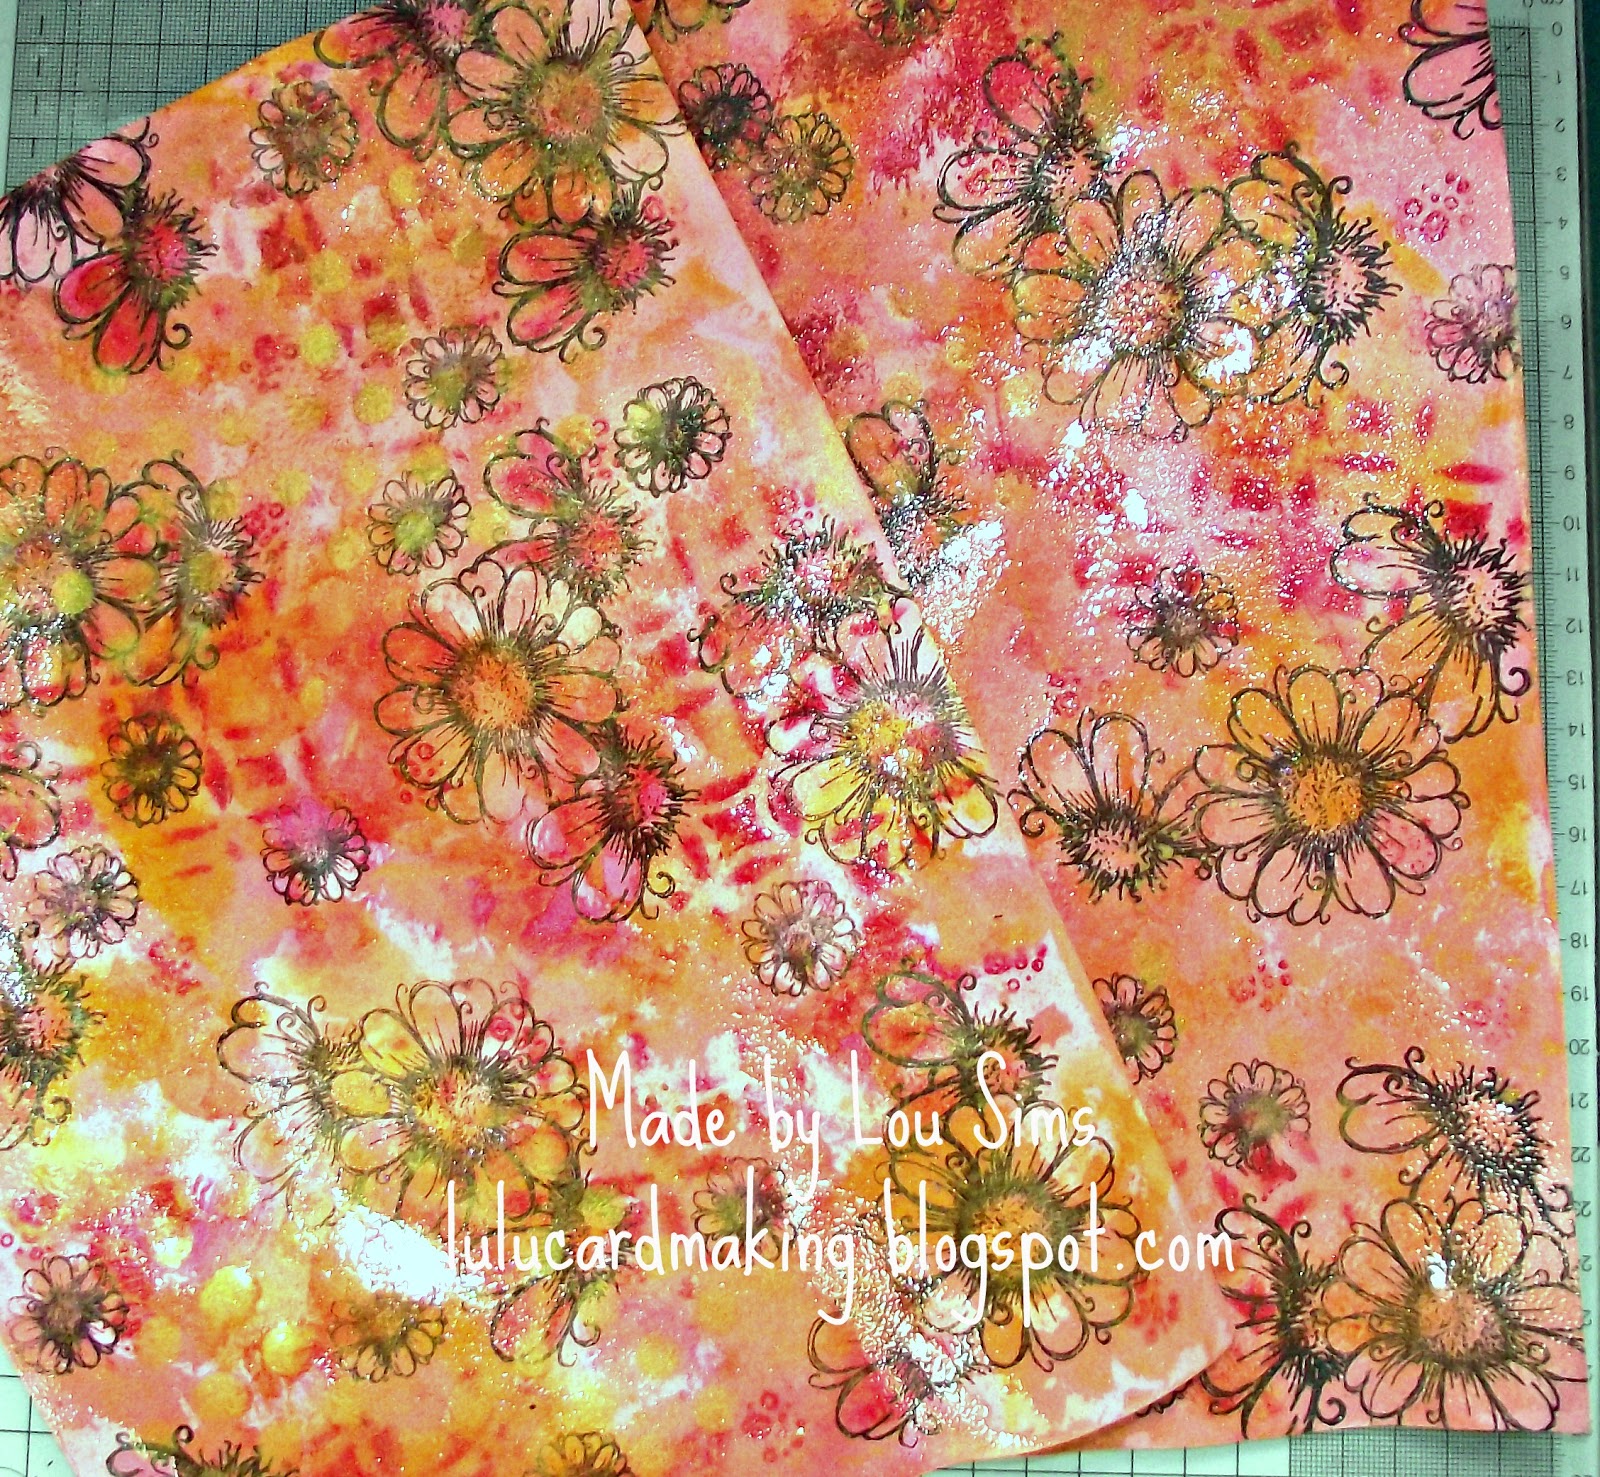
For my notebook and holder I have created all the backing papers and card using the Daisy Days Stamp Me Clear Soup Stamps from Polka Doodles. I began by stamping the Daisy images on to a piece of pink card. Once I was happy I randomly added splodges/swipes of Picked Raspberry and Spiced Marmalade distress ink.

Next using a stencil, I sponged through with Perfect Medium and then added a layer of Soft Gold pan pastel. Using the same stencil, I went over the design with Picked Raspberry distress ink.

Finally I covered my backing design with Perfect medium and embossed with clear detail powder. Now to turn them in to a ....... notebook ...!

I had already made my notebook cover using card scraps and kraft card. I found this Alexandra's tutorial and I have tweaked it slightly to fit my purposes.

I covered the outside ...


and then the inside ...

Next I made some more backing card using the butterfly from the same stamp set with Picked Raspberry and Spiced Marmalade distress inks and will use this to create my notebook extras.

Here is the finished cover decorated using all the backing card shown and additional daisy stamped images. The sentiment is also from the same stamp set. I have deliberately kept the flowers white to add a contrast to the cover and make them a focal point.

Here are a few more photos of the finished holder. This photo shows the inside and in the middle section is the notebook and on one edge, the sticky note holder ...


For a more detailed view of the notebook holder, check out my video on You Tube HERE. I'm getting brave with the videos and now just waiting for a tripod to arrive so I can share how I make my projects from scratch,
Today we're off to visit Luke and Rosie in Norwich and also for a wonderful rummage through the vintage/second hand/antique shops in Magdalene Road. If you visit Norwich, you need to go and while away many an hour in these wonderful shops ...
Lou
x x x
Products and links:

Challenges:
Love 2 Create - anything creative
Crafting with dragonflies - anything goes
A bit more time to craft - anything goes
ABC challenge - lots of layers
The Artistic Stamper - all things bright and beautiful
Creatalicious - anything goes with twist of flowers
So it's no surprise that I have made a further notebook and I took inspiration for the shape from a gift from Luke and Rosie; wonderful tri-fold notebook holder, chocker full of notebooks, decorative papers and other stationary goodies. It however, is made of leather, not card. I found a wonderful tutorial on Alexandria's blog - HERE which is very similar to the tri-fold design of my holder. If you are not following her blog, you really ought to. I love her shabby chic style.
For my notebook and holder I have created all the backing papers and card using the Daisy Days Stamp Me Clear Soup Stamps from Polka Doodles. I began by stamping the Daisy images on to a piece of pink card. Once I was happy I randomly added splodges/swipes of Picked Raspberry and Spiced Marmalade distress ink.

Next using a stencil, I sponged through with Perfect Medium and then added a layer of Soft Gold pan pastel. Using the same stencil, I went over the design with Picked Raspberry distress ink.

Finally I covered my backing design with Perfect medium and embossed with clear detail powder. Now to turn them in to a ....... notebook ...!
I had already made my notebook cover using card scraps and kraft card. I found this Alexandra's tutorial and I have tweaked it slightly to fit my purposes.

I covered the outside ...


and then the inside ...

Next I made some more backing card using the butterfly from the same stamp set with Picked Raspberry and Spiced Marmalade distress inks and will use this to create my notebook extras.

Here is the finished cover decorated using all the backing card shown and additional daisy stamped images. The sentiment is also from the same stamp set. I have deliberately kept the flowers white to add a contrast to the cover and make them a focal point.

Here are a few more photos of the finished holder. This photo shows the inside and in the middle section is the notebook and on one edge, the sticky note holder ...


For a more detailed view of the notebook holder, check out my video on You Tube HERE. I'm getting brave with the videos and now just waiting for a tripod to arrive so I can share how I make my projects from scratch,
Today we're off to visit Luke and Rosie in Norwich and also for a wonderful rummage through the vintage/second hand/antique shops in Magdalene Road. If you visit Norwich, you need to go and while away many an hour in these wonderful shops ...
Lou
x x x
Products and links:
 |  |  |  |  |
 |  |  |  |  |
Challenges:
Love 2 Create - anything creative
Crafting with dragonflies - anything goes
A bit more time to craft - anything goes
ABC challenge - lots of layers
The Artistic Stamper - all things bright and beautiful
Creatalicious - anything goes with twist of flowers
Comments
Mieko xx
Thank you soo much for taking part in our " anything goes with optional add flowers” challenge over at Creatalicious & good luck in the draw.
Hope to see you again in our new challenge as well…
Hugs,
Melanie
(DT-Coordinator Creatalicious Challenges)
(DT Crafty Friends)
(DT The Sketchy Challenges)